CLIP STUDIO PAINT | テキストをトーン化する方法
CLIP STUDIO PAINT(クリスタ)でテキストをトーン化する方法を3つ紹介しています。
CLIP STUDIO PAINT 64bit Version 1.12.8(Windows)
素材パレットからテキストをトーン化する
クリスタの素材パレットのトーンを使ってテキストをトーン化します。
対象のテキストレイヤーを選択して素材パレットにて「単色パターン」から使いたいトーン柄を選んで、キャンパスにドロップします。
トーンレイヤーが作成されます。
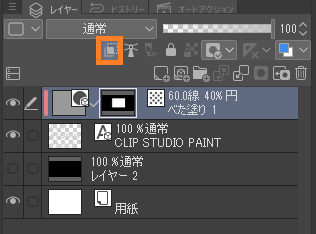
作成されたトーンレイヤーのレイヤーオプションから「下のレイヤーでクリッピング」を有効にします。
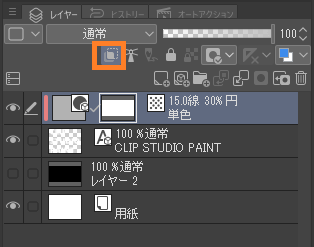
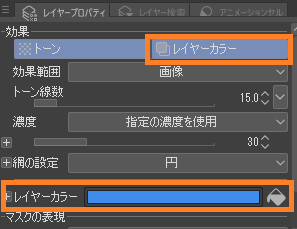
選択したトーン柄が「ホワイトトーン」の場合、テキストの色が白だと見た目上の変化は確認できませんので、テキストの色を変更するか、またはレイヤープロパティに「レイヤーカラー」を有効します。
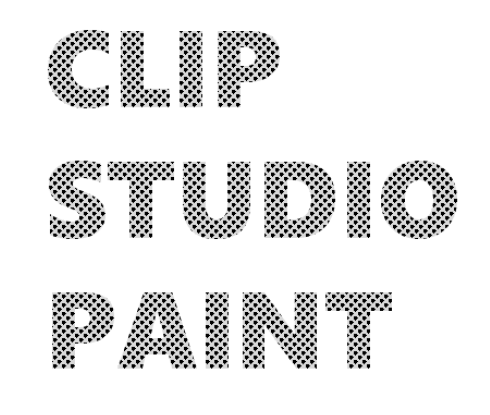
以下はこの方法でテキストをトーン化した結果になります。

トーンレイヤーからテキストをトーン化する
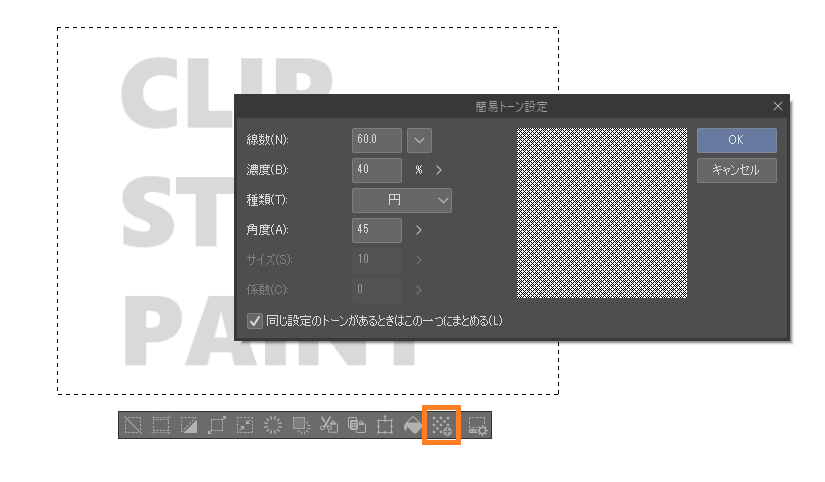
「新規レイヤー」から「トーンレイヤー」を作成して、テキストをトーン化します。

トーンレイヤーを作成したら「簡易トーン設定」が開きますので「OK」を選択します。
※ トーン設定は後から変更できます。
作成したトーンレイヤーのレイヤーオプションから「下のレイヤーでクリッピング」にクリックまたはタップして有効にします。
レイヤープロパティにて好みのトーン柄に設定します。

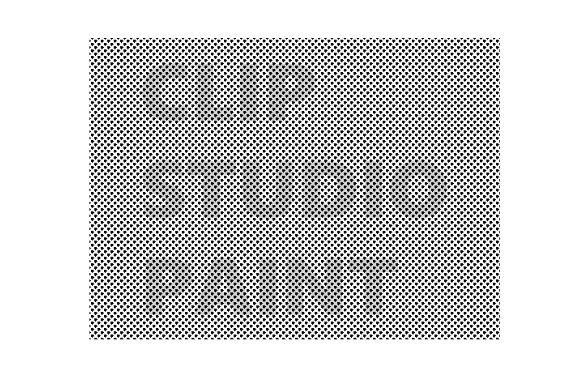
以下はこの方法でテキストをトーン化した結果になります。

選択範囲ランチャーからテキストをトーン化する
選択範囲ランチャーからトーンを作成する場合、選択範囲の形状、部分的にトーンを貼る事ができます。
レイヤー全体またはテキストのある範囲で選択範囲を作成して「選択範囲ランチャー」から「新規トーン」を選択し「簡易トーン設定」で「OK」を選択します。
選択範囲にトーンが描画されます。
作成したトーンレイヤーのレイヤーオプションから「下のレイヤーでクリッピング」にクリックまたはタップして有効にします。
この方法でテキストのトーン化した結果になります。
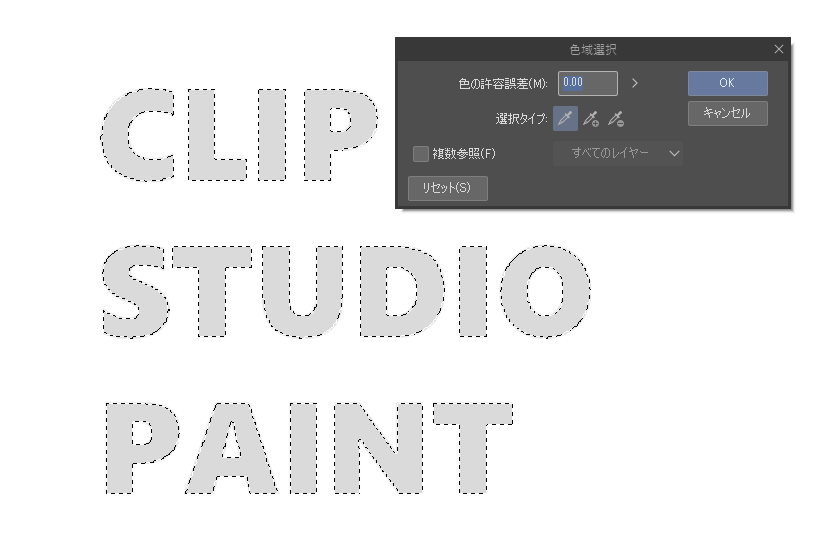
テキストの形状で選択範囲を作成してトーンを貼りたい場合は、テキストレイヤーで「色域選択」を実行し、テキストの形状を取得する方法をおすすめします。
「色域選択」は選択範囲メニューから実行できます。
「色域選択」を起動したら、テキストの描画色の上をクリックまたはタップします。
この方法であれば、「D」や「P」や「O」などの空白部分も除外して選択できます。
「選択範囲ランチャー」から「新規トーン」を選択し「簡易トーン設定」で「OK」を選択します。
結果、テキストの形状にのみトーンが貼れた事が確認できます。
